Stuart Weitzman School of Design
102 Meyerson Hall
210 South 34th Street
Philadelphia, PA 19104
Get the latest Weitzman news in your Inbox
HP Z6810 Printing from Photoshop
ADD-BAS-PLOT-Z2 (Matte Paper), ADD-BAS-PLOT-Z1 (Satin Paper)
View these instructions in PDF form: HP Z6810 Printing from Photoshop Instructions (PDF)
General Info
ADD-BAS-PLOT-Z2 has HP Super Heavyweight Coated Matte paper loaded and costs $1.50 per square foot.
ADD-BAS-PLOT-Z1 has HP Instant Dry Satin paper and costs $1.75 per square foot.
Before sending your file to the printer, make sure it is formatted correctly.
- RGB Color Mode
- Ideally, 300 DPI
- Flattened Tiff or PSD file format. JPG or PDF format is not suggested
Allowing the printer to manage color will give you the most accurate result.
If you are sending a file that exceeds 1 Gig, let the IT staff or lab assistant know that it is intentional. A large file takes a longer amount to go over the network and could potentially jam the print queue. Be sure your file is flattened before sending to print.
Please be considerate of other students' prints when retrieving your own from the print bin.
There are print trimmers located in the 012 Addams Mac Lab and outside of the 001 Silverstein Digital Projects Lab. Please throw away paper scraps after use.
How to Print
Make sure your file (or files) are ready for print.
Choose Image > Mode > RGB Color > 8 or 16 Bits/Channel for each image you will be printing.
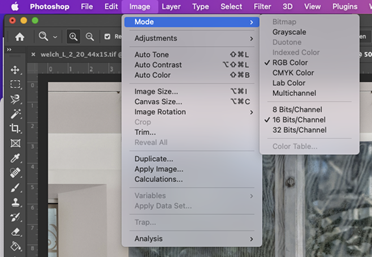
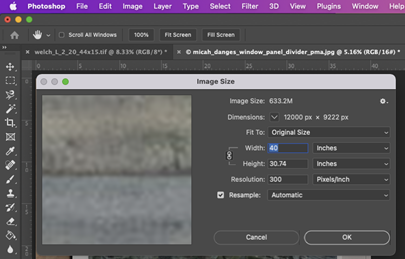
Size your file (or files) to the desired print size, making sure that one dimension does not exceed 41” roll paper width at 300 DPI.
You are charged for the full 41” paper width, so maximize paper use.
> Layer > Flatten Image
*This step will flatten any adjustment layers. If you wish to save the file with working layers, rename the file and save to the desktop to generate a copy.
*If you are only sending one large image to the printer skip step 4a and 4b*
Before creating a new blank document for multiple images, consider the following details.
Each image is flattened and sized consistently to your desired print size. If these details are inconsistent the file dimensions will change when placed onto the new document. (RGB mode, 8 or 16 bit/channel, 300 DPI)
How many images do you want to print and how much border do you prefer between your images?
This will determine the other dimension of your 41” file (41” x ??)
Make things easier and organize your images so they share a common line for trimming. The maximum width of the print trimmer is 48”.
4a- Create a new file
File > New
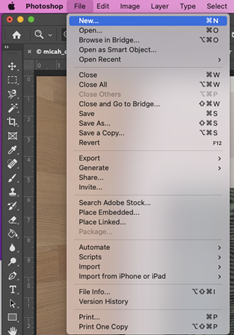
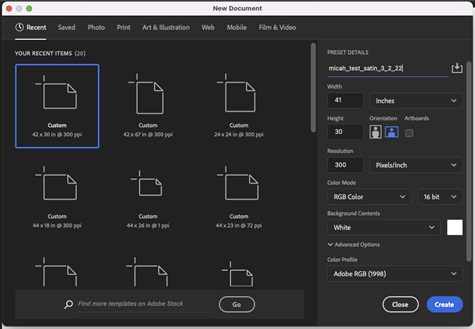
Make sure that one dimension does not exceed 41”, has a consistent resolution size with the images you are placing on this document, select RGB Color Mode and RGB Color Profile.
4b- Place individual images onto new document
Using the move tool, click and drag each flattened image onto the new document. Organize your images so that you are maximizing your printed area and making it easy for handling and trimming your print. Once completed, flatten the file.
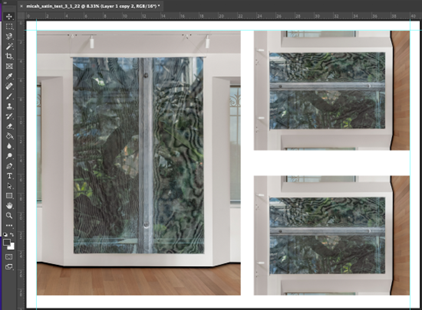
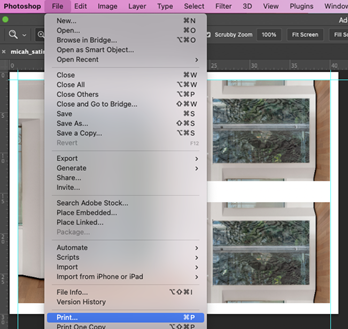
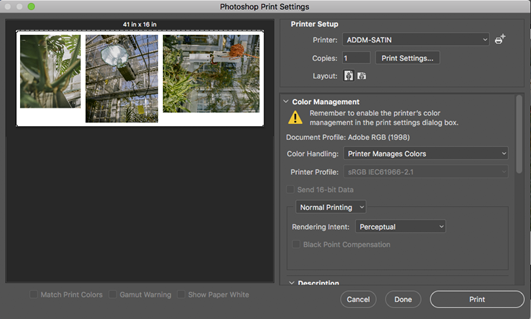
File > Print
Select ADD-BAS-PLOT-Z1 for satin paper or ADD-BAS-PLOT-Z2 for matte paper.
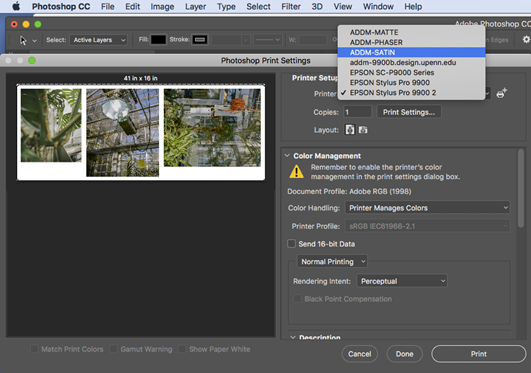
After choosing the desired printer, click on Print Settings.
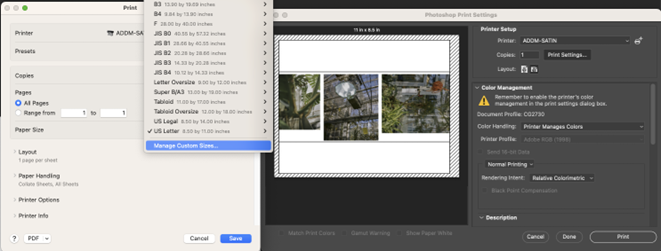
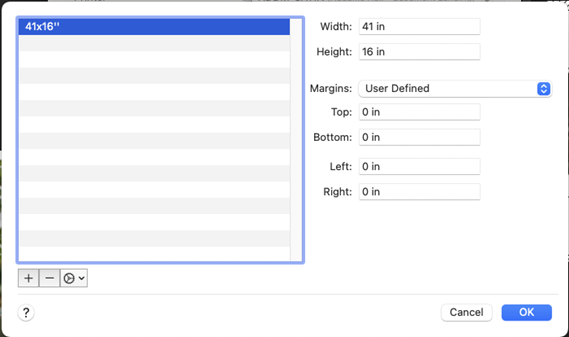
Choose “+” and name the custom paper size.
-The default paper size is set to 8.5” x 11”, so don’t forget to change to your desired print/paper size.
*Be sure to maximize the paper use and set one dimension (height or width) to 41”, which is the roll paper width that you will be charged for.
-Under Non-Printable Area, choose ‘User Defined’ to center the image on the custom paper size and select ‘OK’.
Choose Printer Options and carefully select each of the following settings listed below.
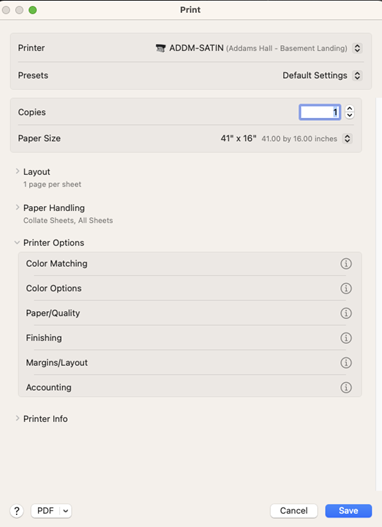
> select Color Matching, choose ‘In Printer’, OK
> select Color Options
‘Color’ for color images or ‘Grayscale’ for black and white images.
- Printer Emulation > OFF
- HP Professional Pantone Emulation > unchecked
- Default Source Profile
- RGB > Adobe RGB(1998)
- CMYK > ISO Coated v2(ECI)
OK
>select Paper/Quality
Quality Options > Custom
Quality > Best
Choose > Maximum Resolution for Photo Papers, Unidirectional
SAVE !
After Printer Settings are saved, you’ll return to the Photoshop Printer Settings dialogue box.

Under “Printer Setup,” Confirm how many copies you want. Printing one is suggested before making multiple copies.
Select the appropriate Layout option if you need to change the orientation of your image. If the preview image looks incorrect, go back and confirm your file size and custom paper size.
Color Handling: Printer Manages Color
Rendering Intent: Choose Perceptual or Relative Colorimetric.
PRINT !
